How to access G-BOX
G-BOX is the integrated development environment of EarthConsole® and it provides you with a Cloud Virtual Machine (VM) with customized computing resources and equipped with pre-installed software supporting EO data exploitation.
This guide shows how to connect to the G-BOX using:
- X2Go remote desktop
- SSH (Secure Shell Protocol) client
- JupyterHub for Jupyter Notebook web access
Before accessing the G-BOX it is necessary to start the G-BOX and get the credentials.
Start the G-BOX
Access to the EarthConsole® WebApp.
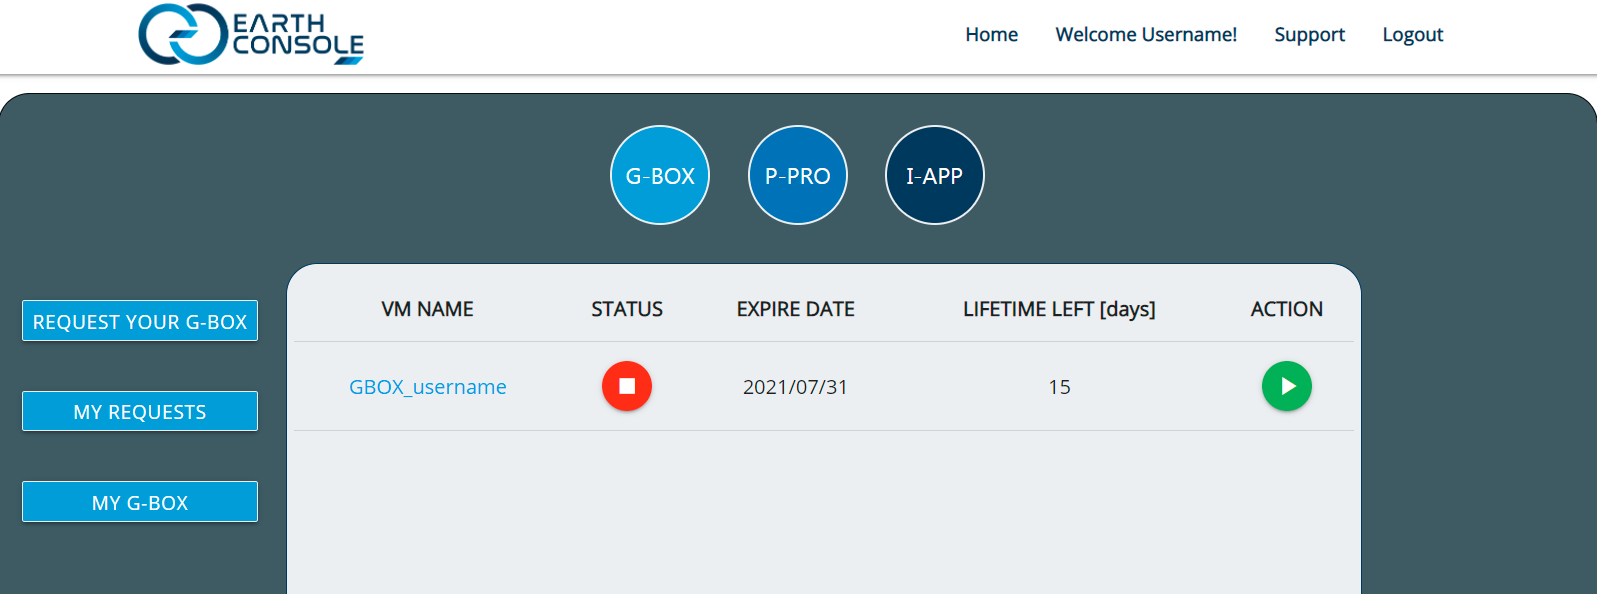
Log in and click on the G-BOX round button
Clicking on MY G-BOX, the VMs associated with your user will be visible.
In order to start the VM click on the green button under “ACTION”
Getting the credentials
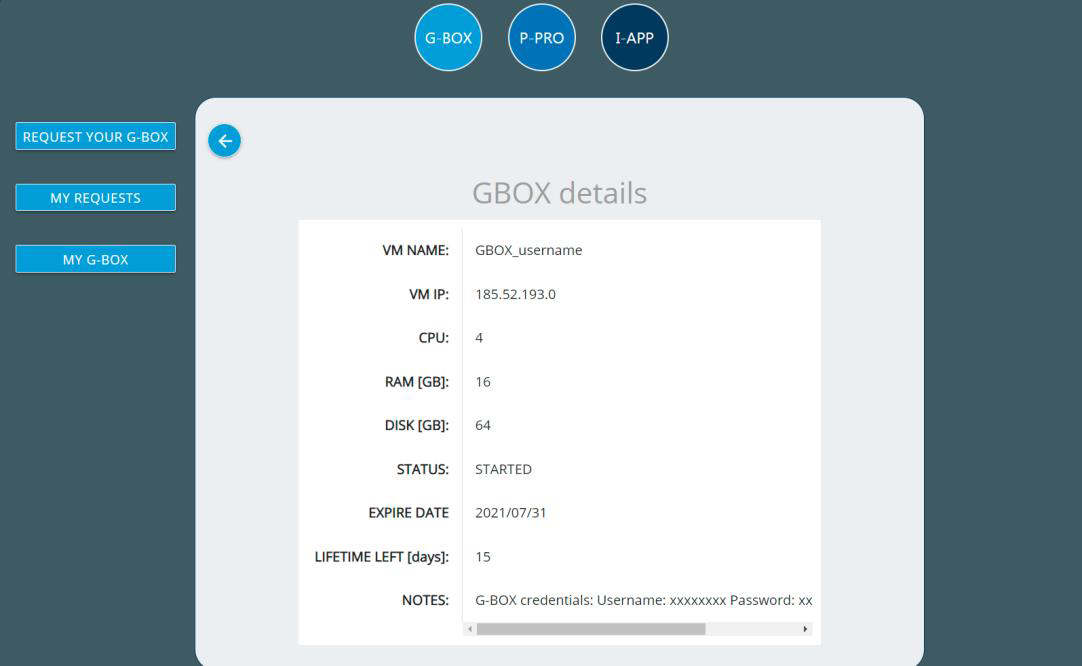
In MY G-BOX page of EarthConsole® WebApp click at the VM name to visualize the G-BOX details.
The credentials for accessing to the VM are next to the text ‘NOTES’ in the list.
For your privacy, we suggest to change the password of the G-BOX machine (VM).
This password change can be done after the first access in two different ways:
- Desktop interface: Via pop-up
- Command lines interface: using the command “passwd”
Connecting with X2Go remote desktop
X2Go is a free, open source remote desktop software and enables you to access a graphical desktop of a computer over a low bandwidth (or high bandwidth) connection. Its main features are:
- Multiple users and sessions, ability to resume disconnected sessions.
- Desktop can be resized and made fullscreen to match the resolution of the client.
- Password-less authentication using SSH keys.
- Sharing folders from the client to the server. Using a separate SCP software is no longer required although it is still advisable for transferring large files.
Download and install the X2Go client for your operating system
Download the client software and follow the instructions from the X2Go website:
http://wiki.x2go.org/doku.php/doc:installation:x2goclient
- Windows users – follow the standard installation procedure. Requires administrator rights.
- Linux users – follow the instructions specific for your Linux distribution.
- Debian and Ubuntu users – make sure you add the X2Go repository to get the most up-to-date version of the client, as described on the web page.
- CentOS and RedHat users – enable epel repository as described on the web page.
- Users of other Linux distributions – refer to the documentation of your distribution and check if the x2goclient package is available in your software package manager.
- Mac users – install and configure the Xquartz X11 server first, as described on the web page. Make sure you download the the X2Go client suitable for your MacOS version.
Configuring the X2Go client
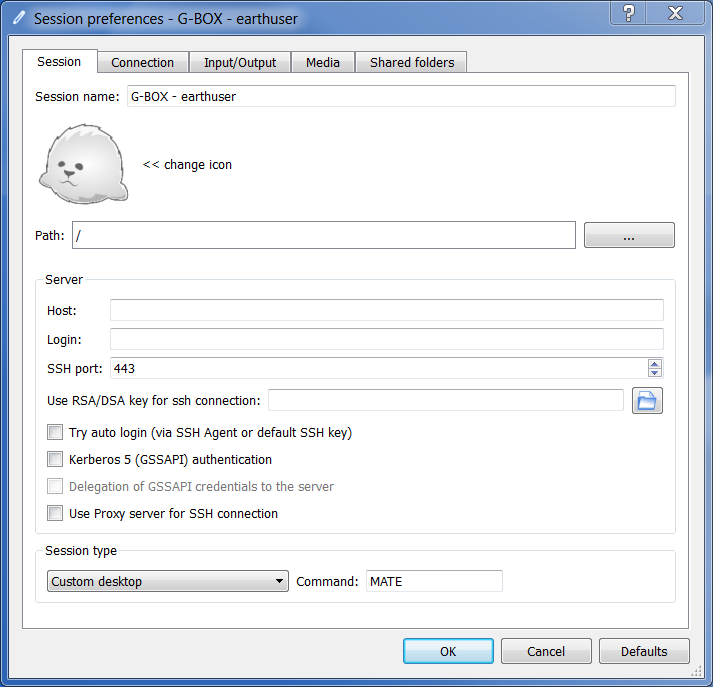
Launch the X2Go client. From the “Session” menu select “New session…” Configure your connection to the G-BOX VM:
Session tab:
- Session name: Put any name meaningful to you
- Host: IP address obtained from the VM information in the portal
- Login: user name obtained from the VM information in the portal
- SSH port: 443 or 22 (both are possible)
- Session type: MATE
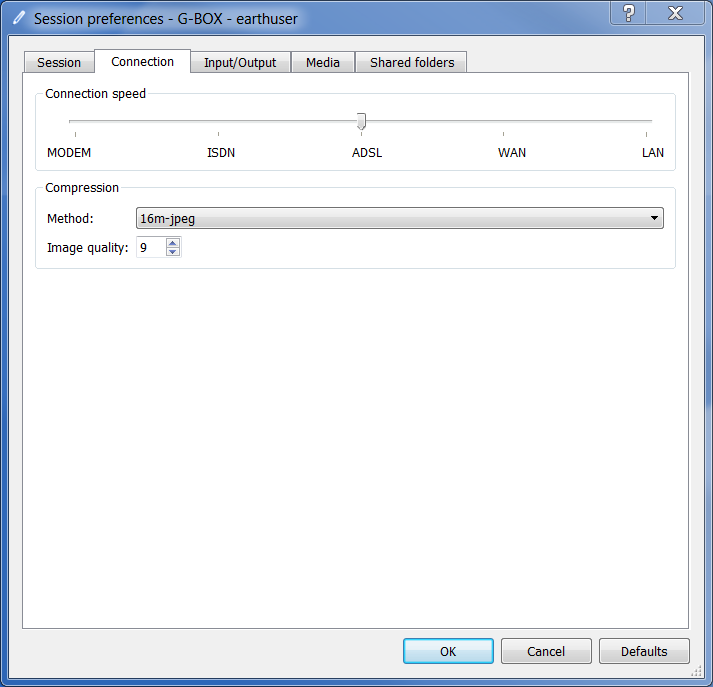
Connection tab:
Connection speed, Compression method and Image quality, try the default settings first, if the desktop is slow and unresponsive then reduce the speed or image quality
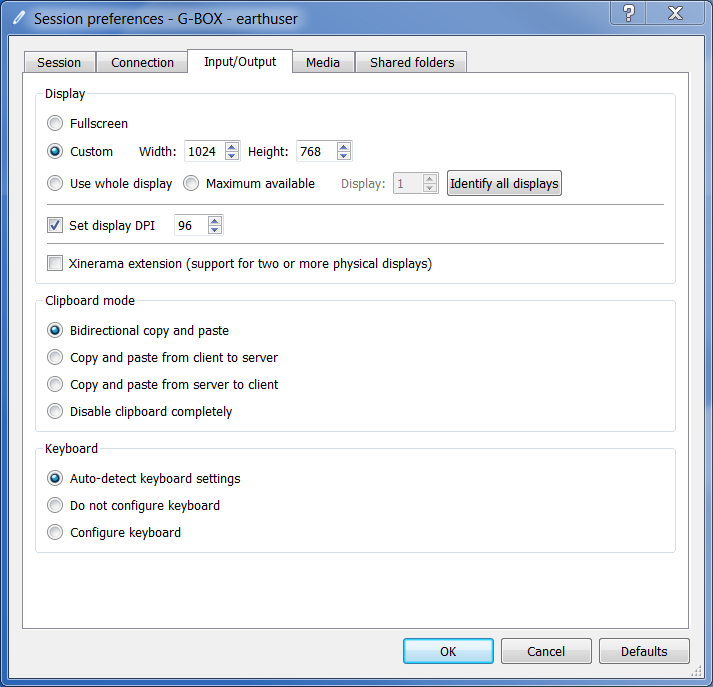
Input/Output tab:
- Display: Fullscreen or select a custom resolution best matching your physical screen and requirements.
- Set display DPI: 96
- Clipboard mode: bidirectional (to allow copy & paste both ways between local to virtual desktop)
- Keyboard: auto-detect
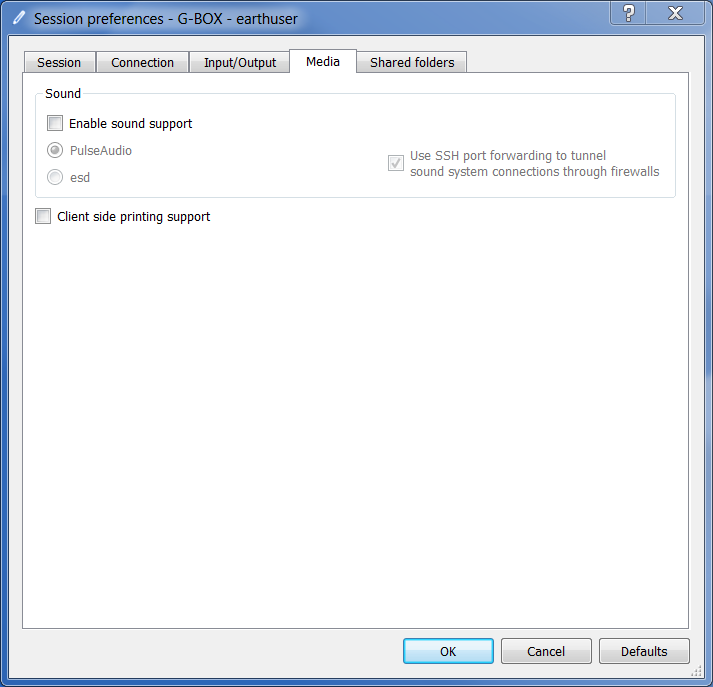
Media tab:
- Sound support: off
- Client side printing: off
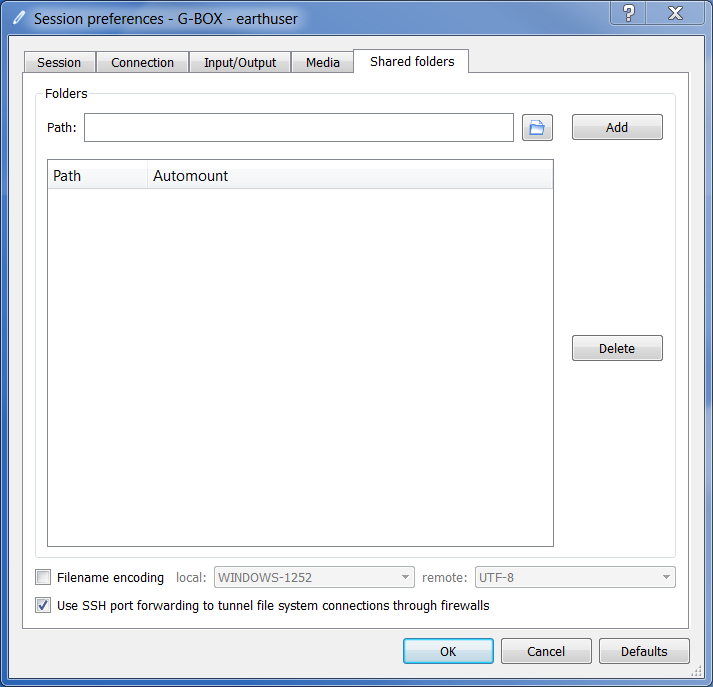
Shared folders tab:
Leave the default settings or refer to the X2Go documentation to learn how to set up shared folders: http://wiki.x2go.org/doku.php/doc:howto:x2goclient-file-sharing
Running X2Go client
When the connection has been configured, a grey box will appear on the right side of the X2Go client window. Click anywhere on the grey rectangle to initiate the connection. Enter your password, obtained previously from the VM information on the portal. Click OK, after several seconds your remote desktop will be displayed in a window or full screen, depending on session settings.
If you get an error connecting to the VM, such as timeout, make sure that the VM is actually started in the portal.
Connecting with SSH client
Download a ssh client (i.e. Putty ssh for Windows and Linux, OpenSSH for Mac):
https://www.chiark.greenend.org.uk/~sgtatham/putty/latest.html (Windows)
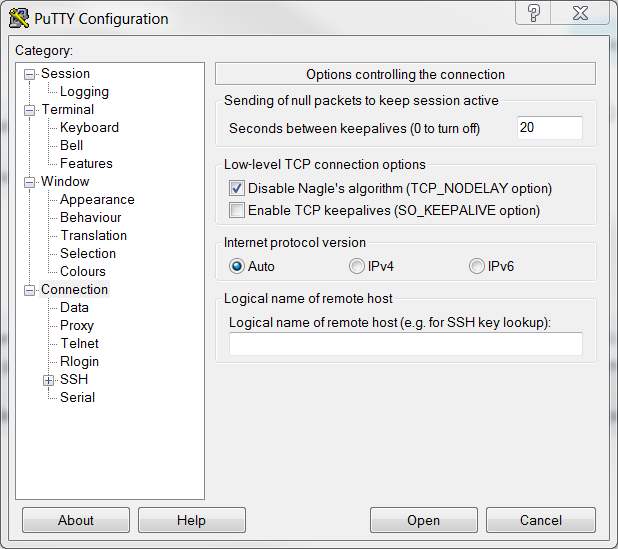
Configure Putty:
In Session category, introduce the Host Name and user with the information that you will find in the credentials that you can find by clicking at the VM name
In Connection category, increase the seconds (e.g. 20) between keepalives in order not to cut the connection with the VM.
Connecting with JupytherHub
Type in the web browser:
where “VM_IP” is the IP of your VM.
Password is the same of “earthuser” VM user. If earthuser password is changed, JupyterHub password has to be manually changed to match the new one.
Transferring data
Even if X2Go offers shared folders feature (http://wiki.x2go.org/doku.php/doc:howto:x2goclient-file-sharing), for transferring large amounts of data it is advisable to use SCP software.
Get an SCP client for your operating system:
- Windows – WinSCP: http://winscp.net/eng/download.php
WinSCP configuration only need to introduce the user/password and IP address.
In case to change the port (from 22 to 443), ensure that the final protocol selected is SCP since WinSCP usually changes.
- Linux – File managers of commonly used desktop environments (Gnome Files/Nautilus, KDE Dolphin) have the support for the SCP protocol built-in
- Mac – RBrowser: http://www.rbrowser.com/


